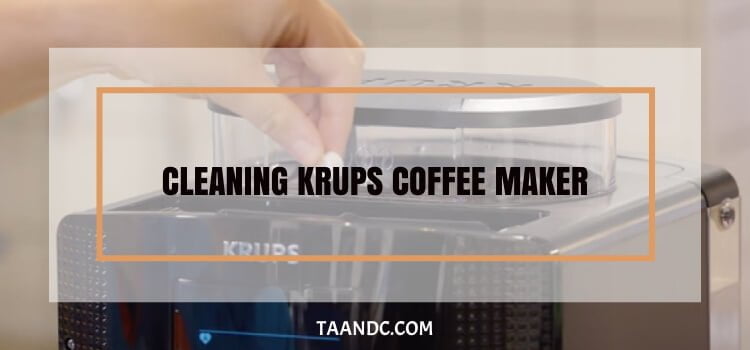
Suppose there’s one thing I’ve learned in my years of savoring the perfect cup of joe. In that case, keeping your trusty Krups coffee maker in pristine condition is vital. Regular maintenance ensures a fresh, untainted brew and extends the lifespan of this beloved kitchen companion. Today, I’m thrilled to share my tried-and-true methods for cleaning a Krups coffee maker. From simple yet effective techniques to the proper arsenal of cleaning supplies, I’ve got you covered. So, let’s roll up our sleeves and embark on this journey to coffee maker rejuvenation. It’s easier than you might think!
Gather Supplies
With the right tools, maintaining a clean and efficient Krups coffee maker is a breeze. Let’s explore the essential cleaning supplies to ensure your coffee maker stays in top-notch condition.
Essential Cleaning Supplies
White Vinegar: This kitchen staple is a powerhouse for tackling mineral deposits and scale buildup in your coffee maker. Its mild acidity makes it safe for use on various machine parts.
Baking Soda: A versatile cleaner, baking soda helps remove stubborn stains and odors from the carafe and other components. It’s non-toxic and readily available in most households.
Soft Bristle Brush: Opt for a brush with soft bristles to reach nooks and crannies that might be tricky to clean with a cloth alone. This ensures a thorough cleaning without scratching the surface.
Microfiber Cloth: This gentle yet effective cloth is perfect for wiping down the exterior of your coffee maker. It won’t leave lint behind and provides a streak-free finish.
Water Filter: If your Krups coffee maker is equipped with a water filter, make sure to have replacements. A clean filter ensures your coffee tastes as fresh as possible.
Organic Cleaners vs. Commercial Cleaners
When selecting cleaners for your Krups coffee maker, you have two primary options: organic or commercial. Each has its merits; the choice ultimately depends on your preferences and environmental considerations.
Organic Cleaners: Natural, eco-friendly solutions like white vinegar and baking soda. They’re highly effective at removing mineral deposits and stains and are safe for you and the environment.
Commercial Cleaners: Specifically designed for coffee makers, commercial cleaners are convenient and often come with detailed instructions. They’re formulated to dissolve stubborn buildup efficiently but follow the manufacturer’s recommendations for usage.
With these supplies at your fingertips, you’ll be well-prepared to embark on the journey to a sparkling-clean Krups coffee maker. Remember, regular cleaning enhances your brew’s flavor and prolongs your beloved appliance’s lifespan.
Preparing for Cleaning
Before we roll up our sleeves and rejuvenate our trusty Krups coffee maker, laying the groundwork for a safe and effective cleaning session is essential. Here are the steps to take in preparation:
Safety Precautions for Handling Appliances
When it comes to handling electrical appliances, safety should always be the priority. These precautions ensure that your cleaning process is incident-free:
Unplug to Safeguard: Start by disconnecting the coffee maker from the power source. This simple action eliminates any risk of electrical shock while you’re cleaning.
Mindful Cooling Down: Your coffee maker retains heat after use. Allow it to cool down for at least 30 minutes to an hour before you begin cleaning. This step prevents any accidental burns.
Handle with Care: When moving the appliance, be mindful of its weight and any protruding parts. Use a steady grip to avoid any accidents.
Unplugging and Cool-down Period
Ensuring the coffee maker is both unplugged and adequately cooled down sets the stage for a safe and successful cleaning process:
Prioritize Unplugging: Always unplug your coffee maker before cleaning. This eliminates any risk associated with electrical components.
Allow for Ample Cooling: Residual heat may be present even after unplugging. Give it the time it needs to cool down completely. This step is vital in preventing accidental burns.
Check Indicator Lights: Some models have indicator lights showing their status. Verify that all lights are off before you proceed. This additional step ensures you’re working with an utterly powered-down appliance.
By adhering to these precautions and allowing your Krups coffee maker to cool down, you’re creating a safe environment for the cleaning process. Remember, a little groundwork goes a long way in ensuring a hassle-free and effective cleaning session!
Cleaning Exterior Surfaces
Now that we’ve ensured our Krups coffee maker is unplugged and safely cooled down, it’s time to clean the exterior thoroughly. Let’s dive into the steps to make your coffee maker shine.
Wiping Down the Exterior
Damp Cloth Method: Damping a clean cloth with warm water. Wring out any excess to prevent water from seeping into electrical components. Gently wipe down all exterior surfaces, paying particular attention to handles and buttons.
Detailing with a Toothbrush: For those hard-to-reach crevices, employ a soft-bristle toothbrush. It’s perfect for getting into tight spots around buttons and seams. Remember to be gentle to avoid scratching the surface.
Removing Stains and Residue
Baking Soda Paste: For stubborn stains, create a paste using baking soda and a small amount of water. Apply it to the affected area, let it sit for a few minutes, and then gently scrub with a cloth or soft brush.
Vinegar for Mineral Deposits: If you’re dealing with mineral deposits, soak a cloth in white vinegar and lay it on the affected area for about 10 minutes. This will help dissolve the stakes, making them easier to wipe away.
Following these steps will make your Krups coffee maker’s exterior look as good as new. Regular cleaning keeps your appliance aesthetically pleasing and ensures it functions at its best. Onward to a sparkling coffee maker!
Cleaning the Carafe and Filter Basket
As we continue our journey towards a spotless Krups coffee maker, we must recognize the carafe and filter basket. These components play a crucial role in the quality of your brew. Let’s delve into the steps for their thorough cleaning.
Removing Coffee Stains and Oils
Hot Water and Dish Soap: Start by rinsing the carafe with hot water to remove loose coffee grounds. Then, add a few drops of mild dish soap and hot water. Swirl it around and use a sponge or brush to scrub stubborn stains.
Baking Soda Scrub: To make stains more resistant, create a paste using baking soda and water. Apply it to the affected areas, let it sit for a few minutes, and then scrub with a brush or sponge.
Using Natural Cleaning Agents
Vinegar Soak for the carafe: To tackle mineral deposits, fill the carafe with equal parts white vinegar and water. Let it sit for about 20-30 minutes. Swirl the mixture around occasionally, then rinse thoroughly.
Lemon Juice for Filter Basket: A mixture of lemon juice and water works wonders for the filter basket. Allow it to soak for 15-20 minutes, then scrub gently to remove any residue.
These steps will ensure your carafe and filter basket are free from coffee stains or residue. This enhances the taste of your brew and prolongs the lifespan of your Krups coffee maker. Onward to a fresher, more flavorful cup of coffee!
Descale the Coffee Maker
A critical aspect of cleaning a Krups coffee maker is addressing scale buildup, which can significantly affect the quality of your brew. Let’s dive into the steps for effective descaling.
Understanding Scale Buildup
What is Scale Buildup: Scale, often seen as a white or brownish residue, results from mineral deposits from hard water. Over time, these deposits accumulate within the coffee maker, affecting its performance and the taste of your coffee.
Impact on Coffee Quality: Scale affects the efficiency of the heating element, leading to longer brew times and potential damage. It also alters the taste of your coffee, giving it a bitter or off-flavor.
Using Vinegar or Citric Acid for Descaling
Vinegar Descale Method: Fill the water reservoir with equal parts white vinegar and water. Run a brewing cycle without coffee grounds. Repeat this process until the water runs clear. Then, run a few cycles with plain water to remove any vinegar residue.
Citric Acid Descale Method: Dissolve citric acid in water according to the manufacturer’s instructions. Fill the reservoir and run a brewing cycle. Repeat as necessary and then run plain water cycles to ensure all traces of citric acid are removed.
Understanding scale buildup and employing the proper descaling method will enhance your Krups coffee maker’s performance and allow you to enjoy a smoother, more flavorful brew. Say goodbye to scale-related woes!
Cleaning the Water Reservoir
A clean water reservoir is the heart of a well-maintained Krups coffee maker. Let’s explore why it’s crucial and how to clean it effectively.
Importance of a Clean Reservoir
Ensures Fresh-Tasting Coffee: Any residue or impurities in the water reservoir can taint the taste of your coffee. Keeping it clean ensures that each cup you brew is as fresh and flavorful as possible.
Prevents Mold and Bacteria Growth: Stagnant water can be a breeding ground for mold and bacteria, especially in warm environments. Regular cleaning of the reservoir helps eliminate this risk.
Using a Mild Detergent for Cleaning
Choosing the Right Detergent: Opt for a mild, non-abrasive detergent safe for use with kitchen appliances. Avoid harsh chemicals or abrasive materials that could potentially damage the reservoir.
Dilute and Scrub: Mix a small amount of the detergent with warm water. Use a sponge or cloth to gently scrub the interior of the reservoir, paying attention to any corners or crevices.
Rinse Thoroughly: After cleaning, rinse the reservoir thoroughly with clean water. This ensures that no detergent residue remains, which could affect the taste of your coffee.
By understanding the significance of a clean water reservoir and employing a gentle detergent for cleaning, you’re ensuring that the heart of your Krups coffee maker remains in top-notch condition. Fresh, untainted brews are just a clean reservoir away!
Maintenance Tips for Longevity
Ensuring the longevity of your Krups coffee maker isn’t just about cleaning; it’s also about adopting an intelligent approach to upkeep. Let’s explore how to maintain your coffee maker for the long haul.
Regularity of Cleaning Schedule
Set a Consistent Schedule: Establish a routine for cleaning your coffee maker. Whether weekly or monthly, having a set schedule ensures that maintenance doesn’t fall by the wayside.
Pay Attention to Manufacturer Recommendations: Different models may have specific cleaning instructions. Always refer to the manufacturer’s guidelines for the best practices tailored to your particular Krups coffee maker.
Avoiding Common Mistakes in Maintenance
Using Harsh Chemicals: Avoid using strong or abrasive cleaning chemicals. They can damage the components and affect the taste of your coffee. Stick to gentle, kitchen-safe cleaners.
Neglecting the Water Reservoir: The water reservoir is often overlooked, but it’s a vital part of your coffee maker. Regular cleaning prevents scale buildup and ensures fresh-tasting coffee.
Skipping the Cool-Down Period: Rushing to clean a still-warm coffee maker can lead to accidents and damage. Always allow it to cool down completely before starting the cleaning process.
By adhering to a regular cleaning schedule and avoiding common maintenance mistakes, you’re ensuring the longevity of your Krups coffee maker and guaranteeing that each cup you brew is of the highest quality. It’s the little things that make a big difference in the lifespan of your beloved appliance!
FAQ
Clean your Krups coffee maker every 1-2 weeks to maintain optimal performance and flavor.
Yes, white distilled vinegar is an effective and safe descaling agent for your Krups coffee maker.
Yes, most Krups coffee makers’ carafes and filter baskets are dishwasher-safe for easy cleaning.
Run a cycle with water and lemon juice to eliminate lingering odors.
Filtered or distilled water in your Krups coffee maker can significantly reduce mineral deposits.
Conclusion
In conclusion, cleaning a Krups coffee maker ensures this beloved kitchen companion’s great-tasting brew and longevity. Maintaining your coffee maker becomes straightforward by following the outlined steps, from the initial safety precautions to addressing common troubleshooting queries. Regularity is key, with a suggested cleaning schedule every 1-2 weeks, and gentle, kitchen-friendly cleaners are highly advised. Additionally, understanding and tackling scale buildup, often overlooked but detrimental to performance, is crucial. Descaling ensures an efficient, smooth brewing process for vinegar or citric acid. With these tips, you’re well-equipped to keep your Krups coffee maker in prime condition, guaranteeing countless cups of flavorful, aromatic coffee in the days ahead.