Clean That Pot Coffee Pot Cleaner has been a game-changer in my morning routine. As someone who enjoys their daily cup of joe, I know how frustrating it can be when your coffee pot starts accumulating stubborn stains and residue. That’s where this incredible coffee pot cleaner comes into play. I’ve tried various cleaning methods, from vinegar solutions to scrubbing with baking soda. Still, something else is needed to match the effectiveness and convenience of Clean That Pot. The best part is that it not only cleans but also helps maintain the pristine condition of my coffee pot.
With this remarkable cleaner, I no longer worry about lingering coffee oils or mineral deposits affecting the flavor of my brew. It’s easy to use, and the results speak for themselves – a spotlessly clean coffee pot that ensures every sip is as delicious as the first. If you’re a coffee enthusiast like me, you’ll wonder how you lived without Clean That Pot Coffee Pot Cleaner. Say goodbye to coffee stains and hello to a consistently satisfying coffee experience!
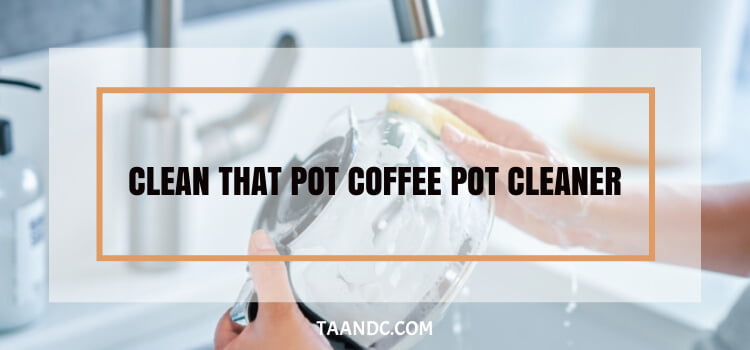
Why Use “Clean That Pot” Coffee Pot Cleaner
If you’re a coffee fan like me, you understand the importance of a clean coffee pot. A well-maintained coffee pot not only enhances the taste of your brew but also ensures the longevity of your beloved coffee maker. That’s where the “Clean That Pot” Coffee Pot Cleaner comes into play. This section will explore why this exceptional cleaner has become essential to my coffee routine. From preserving your coffee’s flavor to extending your coffee pot’s life, “Clean That Pot” offers many benefits that any coffee lover can appreciate. Let’s explore why using this cleaner is a smart choice for coffee enthusiasts.
The Perils of Neglected Coffee Pots
Neglecting the cleanliness of your coffee pot may seem inconsequential. Still, it can have severe consequences for your daily coffee experience. Over time, coffee pots can become a breeding ground for coffee residue, mineral deposits, and mold. These not-so-pleasant elements can significantly impact the quality of your brew.
Imagine waking up to the promise of a fresh, hot cup of coffee, only to be met with a bitter or off-tasting concoction. That’s the unfortunate outcome of a neglected coffee pot. The residues left behind from previous brews can alter your coffee’s flavor and aroma, not in a good way. It’s like enjoying a fine wine from a dirty glass—it just doesn’t work.
Beyond the flavor, there are hygiene concerns too. Mold and bacteria can thrive in an unclean coffee pot’s warm, damp environment. Drinking from such a pot can lead to health issues, including stomach problems. So, you care about your coffee’s taste and safety. Regular cleaning with the “Clean That Pot” Coffee Pot Cleaner is necessary in that case.
Benefits of Regular Cleaning
Now that we’ve addressed the perils of neglected coffee pots let’s delve into the benefits of regular cleaning. Using “Clean That Pot” Coffee Pot Cleaner isn’t just about maintaining a sparkling appearance; it’s about ensuring a consistently excellent coffee experience.
Firstly, regular cleaning preserves the purity of your coffee. When your pot is free from residues and mineral buildup, the flavors of your coffee beans can shine through. You’ll taste the subtle notes and nuances that make each cup unique, whether sipping on a delicate light roast or a robust dark blend.
Secondly, it prolongs the life of your coffee pot. A clean coffee pot is less likely to suffer from wear and tear, which can lead to leaks or malfunctioning parts. This saves you money in the long run and ensures that your favorite coffee maker remains a reliable part of your daily routine.
Using “Clean That Pot” Coffee Pot Cleaner isn’t just about maintaining a clean appearance—it’s about safeguarding the quality of your coffee and the longevity of your beloved coffee pot. So, if you want every sip to be as delightful as the first, make regular cleaning with this remarkable cleaner a part of your coffee ritual.
Getting Started
Your journey to a cleaner, more flavorful coffee experience begins with a few straightforward steps under the “Getting Started” section. Starting on the right foot is essential to make the most of the “Clean That Pot” Coffee Pot Cleaner. This section will guide you through gathering your supplies and preparing your coffee pot for a thorough cleaning. With these initial steps, you’ll ensure that your coffee pot is primed and ready to reap the benefits of this remarkable cleaner, resulting in consistently delicious cups of coffee. So, let’s dive in and start on the path to coffee pot cleanliness and culinary delight!
Gathering Your Supplies
Gathering your cleaning supplies is essential before you embark on the journey to cleaner, tastier coffee with the “Clean That Pot” Coffee Pot Cleaner. Fortunately, you won’t need a laundry list of items; just a few essentials will do the trick.
- Clean That Pot” Coffee Pot Cleaner: The show’s star is the cleaner. Ensure you have a fresh bottle on hand for optimal results. Check the product label for any specific usage instructions or dilution ratios.
- Water: You’ll need clean, cold water to dilute the cleaner and rinse your coffee pot thoroughly. Make sure you have enough to fill your pool.
- Soft-Bristled Brush or Cloth: A soft-bristled brush or cloth is handy for scrubbing stubborn stains or residues. Avoid abrasive materials that could scratch your coffee pot’s surface.
Preparing Your Coffee Pot
Now that your cleaning arsenal is ready, it’s time to prepare your coffee pot for a thorough cleaning. Here’s a step-by-step guide:
- Empty Your Coffee Pot: Start emptying any leftover coffee or liquid. Dispose of any used coffee grounds as well.
- Disassemble Removable Parts: If your coffee pot has removable parts like the lid, filter basket, or carafe, take them apart. This allows for a more thorough cleaning and ensures no nooks and crannies are left untouched.
- Rinse with Warm Water: Give all the removable parts a quick rinse with warm water to remove loose debris and make the subsequent cleaning process more effective.
- Prepare the Cleaning Solution: Refer to the instructions on the “Clean That Pot” Coffee Pot Cleaner bottle for the recommended dilution ratio. Typically, you’ll mix a certain amount of the cleaner with water in your coffee pot.
- Apply the Solution: Pour the cleaning solution into your coffee pot, ensuring it covers the areas affected by stains or residue. Let it sit for the recommended time, as the product label mentions. This allows the cleaner to work its magic and loosen any stubborn deposits.
Following these simple steps in the “Getting Started” section, you’re well on your way to a cleaner, fresher coffee pot. With your supplies gathered and your coffee pot prepared, you can take the following steps toward a spotless and great-tasting coffee experience.
Step-by-Step Cleaning Guide
Maintaining the cleanliness of your coffee pot is essential for preserving the quality and taste of your morning brew. The “Clean That Pot” Coffee Pot Cleaner makes the task effortless and highly effective. In this step-by-step guide, I’ll take you through the entire process of using this remarkable cleaner, ensuring your coffee pot remains pristine.
How to Apply “Clean That Pot”
Before diving into the application process, the first step is to ensure the proper dilution of “Clean That Pot.” This crucial step ensures that you get the best results from your cleaner. Here’s how to do it:
Ensuring Proper Dilution: Start by carefully reading the instructions on the product label. Mix a specific amount of “Clean That Pot” with water. Using the correct dilution ratio is vital for the cleaner’s effectiveness.
- Applying to Internal Surfaces: Once you have the adequately diluted solution, follow these steps to use it on the internal surfaces of your coffee pot:
- Empty the Coffee Pot: Begin by emptying any leftover coffee from the pot and removing used coffee grounds.
- Pour the Solution: Gently pour the diluted “Clean That Pot” solution into the coffee pot, ensuring it covers the stained or soiled areas.
- Let It Sit: Allow the solution to sit inside the coffee pot for the recommended time, usually indicated on the product label. This allows the cleaner to break down and dissolve stains and residues.
- Agitate if Needed: For particularly stubborn stains, gently agitate the solution by swirling it or using a soft brush to scrub affected areas. Always avoid abrasive materials that could harm the pot’s surface.
- Thoroughly Rinse: After the designated time, thoroughly rinse the coffee pot with clean water, repeating the process multiple times to ensure no cleaner residue remains.
Let It Work Its Magic
Coffee Pot Cleaner doesn’t just clean; it works magic to ensure a spotless coffee pot. Here’s what you need to know:
- Recommended Soaking Time: The recommended soaking time can vary depending on the level of buildup. Generally, it is best to follow the product instructions for optimal duration. Longer soaking may be necessary for severe stains.
- Handling Tough Stains: Consider extending the soaking time or gently scrubbing with a non-abrasive brush for tough, stubborn stains. Remember, patience often pays off when dealing with challenging residues.
Scrubbing and Rinsing
To finish the cleaning process and achieve a spotless coffee pot, follow these steps:
- Choosing the Right Cleaning Tools: Use soft brushes or sponges to clean coffee pots. Avoid abrasive scouring pads or materials that could scratch the pot’s surface.
- Thoroughly Rinsing for a Spotless Finish: After scrubbing, rinse the coffee pot thoroughly with clean water to remove any remaining cleaner or residue. Rinse repeatedly to ensure a spotless and residue-free surface.
Following these comprehensive steps, you’ll effectively clean your coffee pot using the “Clean That Pot” Coffee Pot Cleaner, leaving it in pristine condition and ready to brew your next perfect cup of coffee. Your morning ritual just got a whole lot more enjoyable!
Safety & Compatibility
When using any cleaning product, it’s essential to consider safety and compatibility to ensure a hassle-free and risk-free experience. “Clean That Pot” Coffee Pot Cleaner is no exception. In this section, I’ll provide valuable insights into this cleaner’s material compatibility and the necessary safety precautions you should take.
Materials Compatibility
Before you start cleaning your coffee pot with “Clean That Pot,” you must understand which materials are compatible with the cleaner. While “Clean That Pot” is safe for most coffee pots, some materials may not react well. Here’s what you need to know:
- Glass Coffee Pots: “Clean That Pot” is generally safe for glass coffee pots. Glass is a non-reactive material that can withstand cleaning without any issues.
- Stainless Steel Coffee Pots: Stainless steel coffee pots are also compatible with “Clean That Pot.” The cleaner doesn’t damage the stainless steel surface and effectively removes coffee stains.
- Plastic Coffee Pots: Be cautious when using “Clean That Pot” on plastic coffee pots. Some plastics may react with the cleaner, potentially causing damage or discoloration. Always check the manufacturer’s recommendations for cleaning.
- Ceramic Coffee Pots: Ceramic coffee pots are generally safe to clean with “Clean That Pot.” However, testing a small, inconspicuous area before applying the cleaner to the entire bank is wise.
Safety Precautions When Using “Clean That Pot”
To ensure your safety and the best results when using “Clean That Pot” Coffee Pot Cleaner, consider the following precautions:
- Ventilation: Use the cleaner in a well-ventilated area to avoid inhaling fumes. While “Clean That Pot” is generally safe, good ventilation is always a competent practice.
- Protect Your Skin: Wear gloves when handling the cleaner to prevent skin irritation. This is especially important if you have sensitive skin.
- Keep Away from Children and Pets: Store “Clean That Pot” out of the reach of children and pets. They should not ingested or inhaled the product.
- Follow Product Instructions: Always read and follow the instructions on the product label. This ensures that you use the cleaner correctly and safely.
- Avoid Mixing Chemicals: Never mix “Clean That Pot” with other cleaning products, as this can produce harmful chemical reactions. Use it as a standalone cleaner.
By understanding material compatibility and taking safety precautions, you can confidently use the “Clean That Pot” coffee pot cleaner to maintain your coffee pot without concerns. Enjoy the convenience and effectiveness of this product while keeping safety a top priority.
Tips &Tricks
As any coffee enthusiast knows, maintaining your coffee pot is vital to a consistently delicious brew. This section will share tips and tricks to keep your coffee pot in top-notch condition. We’ll explore how to prevent future buildup and establish a routine maintenance schedule that ensures your coffee pot is always ready to deliver that perfect cup.
Preventing Future Buildup
Preventing future buildup in your coffee pot is essential for maintaining its appearance and preserving the flavor of your coffee. Here’s how to do it:
- Rinse After Each Use: After enjoying your coffee, make it a habit to rinse the coffee pot thoroughly with hot water. This simple step helps remove coffee residues and prevents them from accumulating.
- Weekly Deep Clean: A deeper clean is necessary, even with regular rinsing. Consider cleaning your coffee pot with a mild detergent or a dedicated coffee pot cleaner like “Clean That Pot” at least once weekly. This prevents stubborn stains and odors from developing.
- Descale Periodically: If you live in an area with hard water, mineral deposits can build up inside your coffee pot and affect the taste of your brew. To combat this, periodically use a suitable descaling solution for your coffee maker.
- Use Filtered Water: Using filtered water in your coffee maker can also help prevent mineral buildup and prolong the life of your coffee pot. It results in better-tasting coffee as well.
Routine Maintenance Schedule
A routine maintenance schedule is essential for keeping your coffee pot in excellent condition. Here’s a simple guide to follow:
- Daily: Rinse the coffee pot thoroughly after each use.
- Weekly: Perform a deeper clean using a mild detergent or a coffee pot cleaner like “Clean That Pot.” Pay special attention to any stains or residues.
- Monthly: If you have hard water, descale your coffee pot once a month to prevent mineral buildup.
- Quarterly: Check the coffee maker’s manual for manufacturer-recommended maintenance tasks, such as replacing filters or inspecting internal components.
- Annually: Consider a more thorough inspection and maintenance checkup. Replace any worn or damaged parts to keep your coffee maker running smoothly.
Following these tips for preventing future buildup and establishing a routine maintenance schedule will ensure your coffee pot looks great and consistently delivers the high-quality coffee you love. Maintenance goes a long way in preserving the joy of your daily coffee ritual.
Customer Reviews and Testimonials
When considering a new product, hearing from others who have used it can provide valuable insights. In this section, we’ll delve into real-life experiences with the “Clean That Pot” Coffee Pot Cleaner and share success stories from fellow coffee enthusiasts who have made this cleaner an integral part of their daily coffee routines.
Real-Life Experiences with “Clean That Pot”
Here, we’ll showcase the candid experiences of individuals who have incorporated “Clean That Pot” into their coffee pot maintenance routines. These are real people with real coffee pots, and their stories shed light on how this cleaner has made a difference:
- Mark, a Coffee Connoisseur: Mark, a self-proclaimed coffee connoisseur, shares how he struggled with stubborn coffee stains in his beloved glass coffee pot. After trying various methods, he discovered “Clean That Pot.” He was amazed at how it effortlessly removed the stains, restoring his coffee pot’s crystal-clear appearance.
- Sarah’s Morning Ritual: an avid coffee lover, Sarah talks about how “Clean That Pot” transformed her morning ritual. She emphasizes the convenience of using the cleaner and how it eliminates the need for scrubbing and soaking, making her coffee-making process a breeze.
- Mike’s Stainless Steel Delight: Mike, the owner of a stainless steel coffee pot, was initially concerned about finding a suitable cleaner. He shares his relief at discovering that “Clean That Pot” is safe for stainless steel and how it not only cleaned but also maintained the shine of his coffee pot.
Success Stories from Coffee Enthusiasts
In this part, we’ll explore success stories from coffee enthusiasts who credit “Clean That Pot” for enhancing their coffee experiences:
- A Sip of Perfection: Jane, an early riser and coffee lover, raves about how her coffee tastes noticeably better since using “Clean That Pot.” She highlights how the cleaner’s ability to remove residue and stains has elevated her coffee enjoyment.
- A Cleaner Pot for a Happier Morning: James shares how a clean coffee pot sets a positive tone for his day. He describes how “Clean That Pot” has become a vital part of his morning routine, ensuring he starts each day with a spotless pot and a great cup of coffee.
- The Family’s Favorite Cleaner: Emily, a mother of three and a coffee enthusiast, talks about how “Clean That Pot” has simplified her life. She no longer worries about coffee stains in the family coffee pot; her kids even help with cleaning.
These real-life experiences and success stories from coffee enthusiasts like Mark, Sarah, Mike, Jane, James, and Emily demonstrate the “Clean That Pot” Coffee Pot Cleaner’s positive impact on your coffee pot maintenance journey. Their stories offer valuable insights and inspiration for those looking to elevate their coffee-making experiences.
FAQ
Can I use “Clean That Pot” on plastic coffee pots?
While it’s generally safe, it’s a good idea to check the manufacturer’s recommendations for your specific plastic coffee pot to ensure compatibility.
How often should I use “Clean That Pot” to clean my coffee pot?
Using “Clean That Pot” once a week is recommended for routine maintenance, but adjust as needed based on your coffee pot’s condition and usage.
Is “Clean That Pot” safe for glass coffee pots?
Clean That Pot” is safe for glass coffee pots and effectively removes stains and residues.
Can I use “Clean That Pot” to clean other coffee maker parts, like the carafe or filters?
While it’s designed primarily for coffee pots, “Clean That Pot” can also be used on some coffee maker parts. However, always check the product label for guidance.
Will “Clean That Pot” remove hard water stains from my coffee pot?
Yes, “Clean That Pot” effectively removes hard water stains, but you may need to soak the pot longer or use it more frequently for severe buildup.
Conclusion
Incorporating Clean That Pot Pot Pot Cleaner into your coffee pot maintenance routine can transform your coffee experience. As we’ve explored, this remarkable cleaner not only effectively removes stubborn stains and residues but also contributes to the longevity of your coffee pot. The step-by-step guide ensures you use the product correctly, and the safety precautions and materials compatibility tips ensure a hassle-free cleaning process. Moreover, coffee enthusiasts’ real-life experiences and success stories underscore the product’s effectiveness and convenience. By following the information provided to prevent future buildup and establish a maintenance schedule, you can ensure that your coffee pot remains pristine and ready to deliver that perfect cup of coffee every time.