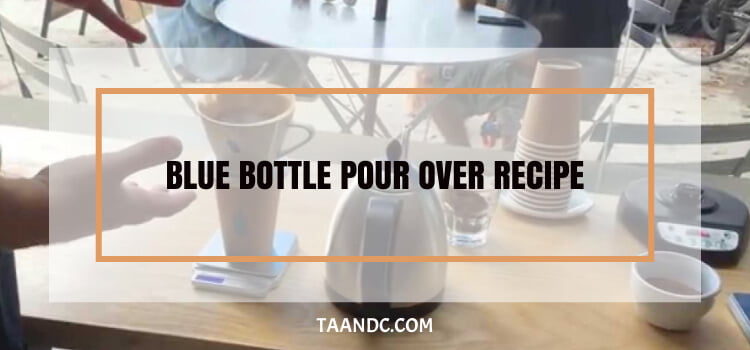
If you're anything like me, you understand the sheer delight of a perfectly executed pour-over. Today, I'm thrilled to share my tried-and-true blue bottle pour-over recipe. This method is more than a routine; it's an art form, an alchemical dance between water and beans. Over the years, I've honed this technique to create a brew that's nothing short of extraordinary. Join me as we dive into the essential steps and nuances, ensuring every sip is a symphony of flavors. Get ready to elevate your coffee game and experience the magic of a meticulously crafted blue bottle pour-over.

Essential Equipment
Brewing the perfect blue bottle pour-over begins with having the right tools at your disposal. Each piece plays a crucial role in achieving that impeccable cup of coffee.
Blue Bottle Pour Over Kit Overview
The heart of this method lies in the specialized Blue Bottle Pour Over Kit. This kit typically includes a dripper, glass decanter, filters, and a lid. The dripper is designed for optimal water flow and even extraction. The glass decanter allows for easy monitoring of the brewing process, while the filters ensure a clean, sediment-free brew. The lid helps retain HeatHeat and preserve the aroma. Investing in this kit is a game-changer for any serious coffee enthusiast.
Coffee Beans
The quality and type of coffee beans are paramount. Opt for high-quality, freshly roasted beans. Blue Bottle Coffee, known for its meticulously sourced and roasted beans, offers a variety of blends. Experiment to find one that aligns with your palate preferences, whether a single-origin delight or a well-balanced mix.
Grinder and Grind Size
A burr grinder is recommended for a consistent grind size. The grind size is crucial in determining the rate of extraction. Aim for a medium grind for a blue bottle pour-over, resembling coarse sand. This allows for an even extraction, preventing over-bitterness or under-extraction.
Scale and Timer
Accurate measurements are critical. A digital scale ensures precise coffee-to-water ratios, while a timer helps regulate brewing. Consistency in these elements leads to consistently great cups of coffee. Remember, Precision is the cornerstone of a stellar blue bottle pour-over.
Preparation of Blue Bottle Pour Over Recipe
Before you craft a sublime blue bottle pour-over, it's crucial to lay the foundation with meticulous preparation.
Heating Water
Water temperature is critical in extracting the best flavors from your coffee grounds. Aim for a temperature between 195°F and 205°F (90°C - 96°C) for the perfect Brew. Use a kettle with temperature control, or bring the water to a boil and let it sit for about 30 seconds to achieve the ideal range. As for quantity, measure the water according to your desired coffee-to-water ratio. This ensures consistent results with every pour.
Rinsing the Filter
Before you start brewing, it's essential to rinse the filter thoroughly. This removes any paper residue and preheats the brewing vessel, ensuring it won't absorb HeatHeat from your brewing water. Place the filter in the dripper and pour hot water, allowing it to flow into your decanter. Discard the rinse water. This step may seem minor, but it significantly impacts the taste and quality of your pour-over.
Warming the Vessel
Ensuring your brewing vessel is at the right temperature is crucial for a consistent extraction. Pour some hot water into the decanter and swirl it around, allowing it to warm the glass thoroughly. Then, discard the water. This step maintains the temperature during the brewing process. It enhances the extraction, resulting in a more flavorful cup of coffee. Remember, attention to detail in preparation sets the stage for a perfect blue bottle pour-over.
Measuring and Grinding
In the realm of pour-over coffee, Precision is paramount. The journey towards that impeccable blue bottle pour-over starts with two crucial steps: measuring the coffee-to-water ratio accurately and grinding the beans to perfection. Let's delve into these essential components.
Accurate Coffee-to-Water Ratio
The golden rule of pour-over brewing is achieving the right balance between coffee and water. For a balanced brew, aim for a coffee-to-water ratio of approximately 1:16 to 1:17. For every gram of coffee, you'll use 16 to 17 grams of water. However, feel free to adjust this ratio according to your taste preferences. A kitchen scale is your best ally, providing precise measurements and ensuring Consistency across brews. For example, if you're using 20 grams of coffee, you'll want to pour around 320 to 340 grams of water. This balanced ratio guarantees a flavorful extraction without overwhelming bitterness or dilution.
Read More: Philips 3200 Vs De'Longhi ECAM35075S: A Tale Of Two Machines
Grinding the Beans to Perfection
The grind size of your coffee beans wields immense influence over the brewing process. For the blue bottle pour-over, opt for a medium grind. Imagine it resembling sea salt - not too fine, not too coarse. This Consistency allows for an even extraction, ensuring that every particle of coffee contributes to the final flavor profile.
A burr grinder is the tool of choice for achieving this uniformity. Unlike blade grinders, which can lead to uneven particle sizes, burr grinders provide a consistent grind. Remember, uniformity is critical. If a task is too delicate, the Brew may turn bitter; it could become weak if it is too coarse. Experiment and fine-tune until you've found that sweet spot.
Measuring and grinding are your first steps towards a sublime blue bottle pour-over. Mastering these elements sets the stage for a truly exceptional cup of coffee.
Brewing Process
Now comes the exhilarating part - the actual brewing process. It's where science and art come together to create the perfect blue bottle pour over. Let's break it down step by step.
Blooming
This initial step is a crucial one. It's called the "bloom" because you're allowing the coffee grounds to release gases inhibiting extraction. Start by pouring just enough hot water (about twice the weight of the coffee) to saturate the grounds evenly. You'll notice the coffee "bloom" and expand. Let it sit for about 30 seconds. This step preps the feet for complete extraction, ensuring a robust and balanced flavor profile.
Controlled Pours
Maintaining a steady and controlled pour is critical to an even extraction. Pour the hot water in a circular motion, starting from the center and spiraling outward. This technique ensures that all the coffee grounds receive equal water, leading to a balanced brew. Avoid pouring too quickly or slowly, as this can lead to over- or under-extraction. Practice and precision are your best friends during this step.
Brewing Time
The total brewing time from the initial pour to the final drip should be 5 to 3 minutes. This timeframe allows for optimal extraction without over-extracting, which can result in bitterness. Keep an eye on the process and adjust as needed. If the brewing time is too short, you may end up with a weak brew; too long, and it could be too bitter. Finding your ideal extraction time involves experimentation and tuning into your taste preferences. Remember, practice makes perfect in the world of blue bottle pour-overs.
Technique and Tips for Blue Bottle Pour Over Recipe
Brewing a blue bottle pour-over is a dance of Precision and finesse. The technique you employ and the tips you follow can make all the difference between a good cup and an extraordinary one. Let's explore the crucial elements that elevate your pour-over game.
Circular Pouring
When it comes to pouring, think of circles. Start at the center and work your way outwards in a steady, controlled motion. This circular pouring technique ensures that every particle of coffee gets its fair share of water. You're setting the stage for a balanced and flavorful extraction by saturating the grounds uniformly. Imagine you're painting a gentle spiral, letting the water interact with the coffee grounds in a harmonious rhythm. Avoid pouring too aggressively, as this can disrupt the evenness of the extraction process. Practice this technique, and soon it will become second nature.
Read More: Blue Bottle Kettle: Experience Perfect Brews
Maintaining a Steady Flow
Consistency is the name of the game when it comes to pouring. Aim for a steady, controlled flow. Avoid sudden spurts or rushes of water, as they can lead to uneven extraction. The goal is maintaining a gentle, continuous stream evenly bathes the coffee grounds. Imagine a slow, deliberate stream of water akin to a gentle rain shower. This steady flow coaxes out the nuanced flavors from your coffee beans. Patience and control in your pouring technique are critical factors in achieving a remarkable blue bottle pour-over.
Adjusting Variables
Every pour-over is a unique symphony of factors; sometimes, adjustments are needed. Be bold and tweak the variables if your Brew is too strong or weak. You can alter the grind size, water temperature, or the coffee-to-water ratio to achieve your desired flavor profile.
For example, consider using a slightly coarser grind or reducing the brewing time if your Brew is too strong and bitter. Conversely, if it's too weak, try a finer grind or extend the brewing time. Remember, mastering the art of pour-over involves a bit of experimentation and fine-tuning to cater to your personal taste preferences. Technique and tips are your guiding stars in the blue bottle pour-over world. With practice and attention to detail, you'll unlock the full potential of this exquisite brewing method.
Taste, Testing & Adjustments
The culmination of your meticulous brewing process is the moment of truth - the taste test. This is where your senses take center stage, guiding you towards the perfect cup of blue bottle pour over. Let's explore the crucial steps in taste testing and adjusting for future brews.
Evaluating Aroma & Flavor Profiles
Pay attention to the nuanced scents that greet your senses as you take that first aromatic whiff. Is it earthy, fruity, or nutty? This initial olfactory experience offers a preview of what's to come. Next, take a thoughtful sip and let the flavors dance on your palate. Is it bold and robust, or subtle and nuanced? Note the balance between acidity, sweetness, and bitterness. These sensory cues will guide your assessment. Consider keeping a journal to record your observations. It's a valuable tool for tracking your preferences and making informed adjustments in the future. Over time, you'll develop a deeper understanding of your own taste profile.
Making Adjustments for Future Brews
Each blue bottle pour-over is a learning opportunity. Stay energized if your current Brew isn't hitting the mark. Instead, view it as a chance to fine-tune and improve. Start by considering the key variables: grind size, water temperature, and brewing time. These elements can be adjusted to align your Brew with your taste preferences.
For example, if you find your Brew a tad bitter, consider a slightly coarser grind or a shorter brewing time. If it's lacking depth, try a finer grind or a touch of hotter water. Remember, the beauty of pour-over lies in its adaptability. Each adjustment brings you one step closer to crafting your perfect cup. Taste testing and adjustments are the final strokes in your blue bottle pour-over masterpiece. Embrace the process, trust your palate, and revel in the journey towards coffee perfection.
Presentation & Enjoyment
Now that you've skillfully brewed your blue bottle pour-over, it's time to revel in the final act of this coffee-making art form. The presentation and enjoyment phase is where you savor the fruits of your labor. Let's walk through the steps to make your pour-over experience extraordinary.
Transferring the Brew to a Cup or Carafe
With your pour-over complete, carefully transfer the brewed coffee to a cup or carafe. The goal is to maintain the integrity of the Brew you've worked diligently to create. Use a steady hand and a gentle pour to ensure a smooth transfer. This step completes the brewing process and sets the stage for the ultimate tasting experience. Consider using a vessel that allows you to appreciate your Brew's rich color and clarity. A glass or ceramic cup is an excellent choice, as it lets you fully immerse yourself in the visual aspect of your creation.
Adding Milk or Sweeteners (Optional)
The beauty of a blue bottle pour-over lies in its versatility. While the Brew is often enjoyed in black to fully savor its nuanced flavors, feel free to customize it. If you prefer a creamier texture, consider adding a splash of milk or cream. For those with a sweet tooth, a touch of sugar, honey, or flavored syrup can be a delightful addition. Remember, the choice is entirely yours. Experiment with different combinations until you find the perfect balance that suits your palate. Just be sure not to overpower the intricate flavors you've worked so hard to extract.
Savoring the Blue Bottle Pour-Over Experience
Finally, the moment you've been waiting for – the first sip. Take a moment to appreciate the aroma from the cup, and then let the liquid grace your palate. Allow the flavors to dance across your taste buds, noting the intricate balance of acidity, sweetness, and body. Sip slowly and deliberately, savoring each moment. Take the time to immerse yourself in the experience you've crafted truly. I appreciate the dedication, Precision, and artistry that went into creating this exceptional cup of coffee.
Presentation and enjoyment are the grand finale of your blue bottle pour-over journey. It's a celebration of your skill and passion for exceptional coffee. Relish in this moment, and know you've mastered the art of pour-over.
Read More: Bialetti Pour Over: Elevate Your Coffee Experience
Troubleshooting Common Issues
Even the most seasoned coffee enthusiasts encounter hurdles in pursuing the perfect blue bottle pour-over. But fear not! You can address these common issues and elevate your pour-over game with some know-how. Let's dive into some potential pitfalls and their solutions.
Over-extraction and bitterness
Over-extraction occurs when the coffee is in contact with water for too long, or the grind size needs to improve. This can result in a brew that's overly bitter and astringent. To remedy this, consider the following:
- Adjust Your Grind: Coarsen the grind slightly to reduce extraction. Aim for a texture resembling kosher salt.
- Shorten Brewing Time: Pour more slowly or reduce the brewing time to minimize extraction.
Under-extraction and Weakness
Conversely, under-extraction happens when the coffee needs to contact water longer. This leads to a brew that needs more depth and may taste sour. Here's how to address it:
- Finer Grind: Grind the beans a bit finer and closer to table salt consistency to increase extraction.
- Extend Brewing Time: Allow the water to interact with the coffee grounds longer.
Other Potential Pitfalls and Solutions
Beyond over and under-extraction, there are a few other challenges you might face:
- Uneven Pouring: Ensure a consistent, circular pour to prevent uneven saturation of the coffee grounds.
- Inconsistent Water Temperature: Use a kettle with temperature control or pre-boil and rest water for 30 seconds for optimal temperature.
- Inadequate Scaling: Always accurately measure your coffee and water to maintain the desired ratio.
By troubleshooting these common issues, you're honing your skills and gaining a deeper understanding of the intricacies of the blue bottle pour-over process. Remember, practice and patience are your greatest allies. With each adjustment, you're one step closer to mastering the art of pour-over perfection.
FAQ
What is a Blue Bottle Pour Over
A Blue Bottle Pour Over is a specific method of brewing coffee that emphasizes Precision and quality. It uses a dedicated pour-over kit from Blue Bottle Coffee. It follows a meticulous process to extract the best flavors from the coffee grounds.
What equipment do I need for a Blue Bottle Pour Over?
To perform a Blue Bottle Pour Over, you'll need a Blue Bottle Pour Over Kit (which includes a dripper, glass decanter, filters, and lid), high-quality coffee beans, a grinder, a scale, a timer, and a kettle with temperature control.
How do I achieve the perfect grind size for a Blue Bottle Pour Over?
aim for a medium grind similar to sea salt for a Blue Bottle Pour Over. A burr grinder is recommended for uniformity. This grind size allows for even extraction without over-bitterness or under-extraction.
What's the ideal water temperature for a Blue Bottle Pour Over?
The optimal water temperature for a Blue Bottle Pour Over is between 195°F and 205°F (90°C - 96°C). This range ensures proper extraction without scalding or underwhelming the coffee grounds.
How can I troubleshoot common issues with a Blue Bottle Pour Over?
Common issues like over-extraction, bitterness, or under-extraction can be addressed through adjustments in grind size, pouring technique, and brewing time. Fine-tuning these variables can help achieve the desired flavor profile in your pour-over coffee.
Conclusion
In mastering the art of the Blue Bottle Pour Over, Precision and technique are paramount. Each element contributes to a refined brew, from the crucial steps of measuring the coffee-to-water ratio and grinding the beans to perfection to the delicate process of blooming and controlled pouring. The final act of presentation and enjoyment allows for personalization, whether sipped black or adorned with milk and sweeteners. And in troubleshooting, one finds the path to perfection, correcting over-extraction, under-extraction, or other potential pitfalls. With patience and practice, the Blue Bottle Pour Over becomes not just a method but a ritual of elevating coffee to its highest form.


